

Assess First, Fix Hip Shift in Your Squat in 4–6 Weeks
A hip shift is a lateral translation of the pelvis to one side as you drop into a squat, usually showing up near the bottom of the range. If it’s small, doesn’t change under heavier loads or fatigue, and comes without pain, leave it alone. If it worsens as the bar gets heavier, shows up more on late reps, or comes with knee or hip discomfort, it’s worth investigating causes like ankle dorsiflexion, hip rotation, and stance width.
TL;DR:
- A hip shift during squat depth often stems from ankle dorsiflexion limitations, with tight calves frequently exacerbating the issue.
- Hip internal rotation restrictions and anatomical variations like femoral version also contribute, especially at greater depths or under fatigue.
- Assessing mobility, stance, and side-to-side differences through specific tests can help identify the primary driver before applying targeted corrections.
- Strengthening glutes alone is insufficient; addressing ankle, hip, and neuromuscular control is crucial for lasting correction of a load-dependent hip shift.
- Stable patterns without pain or performance limitations typically do not require correction, and unnecessary intervention can reduce squat effectiveness.
Table of Contents
- What a Hip Shift Squat Actually Looks Like
- What Causes a Hip Shift During a Squat?
- How Do You Assess a Hip Shift Yourself?
- The Mobility Side: Hips, Ankles, and Pelvic Position
- Does Glute Strength Actually Fix a Hip Shift?
- A Stepwise Program to Correct a Persistent Hip Shift
- Should You Change Your Stance or Foot Angle?
- When Should You Leave a Hip Shift Alone?
- A 4 to 6 Week Sample Progression Grounded in Clinical Assessment
- What Coaches Get Wrong About “Fixing” Asymmetry
- How The Tx Room Supports a Persistent Hip Shift
- Sources
- FAQ
What a Hip Shift Squat Actually Looks Like
Film yourself from the front and you’ll see it immediately: as you descend, one hip kicks out to the side while the opposite knee often caves inward. It looks like the whole pelvis slides off-center rather than staying stacked between your feet. Some lifters notice it only on their heaviest sets. Others see it on every rep, even with an empty bar.
That distinction matters for how you respond to it. A stable personal pattern shows up consistently regardless of load, tends to be symmetrical in its effect on performance, and doesn’t get worse as reps or weight increase. A load-dependent shift is different. It appears or intensifies only when you approach a heavy single, when you’re fatigued late in a set, or when depth increases. That second pattern usually signals a real limitation, whether it’s mobility, motor control, or asymmetrical strength, rather than a stylistic quirk.
The mechanical downstream effect is usually medial knee displacement, sometimes called knee valgus in the squat. When the pelvis shifts, the femur on the shifted side often rotates and adducts, pulling the knee inward. This isn’t automatically dangerous, but it can:
- Reduce force transfer through the hip and ankle, which shows up as a sticking point or grinding rep.
- Create localized irritation at the knee or hip over months of repeated loading.
- Make the lift feel asymmetrical or “off,” even when weight moves fine.
Coaches and clinicians who work with this pattern generally agree the shift itself isn’t the problem. The problem is what’s driving it, according to a biomechanical breakdown of hip shift causes and fixes.
What Causes a Hip Shift During a Squat?
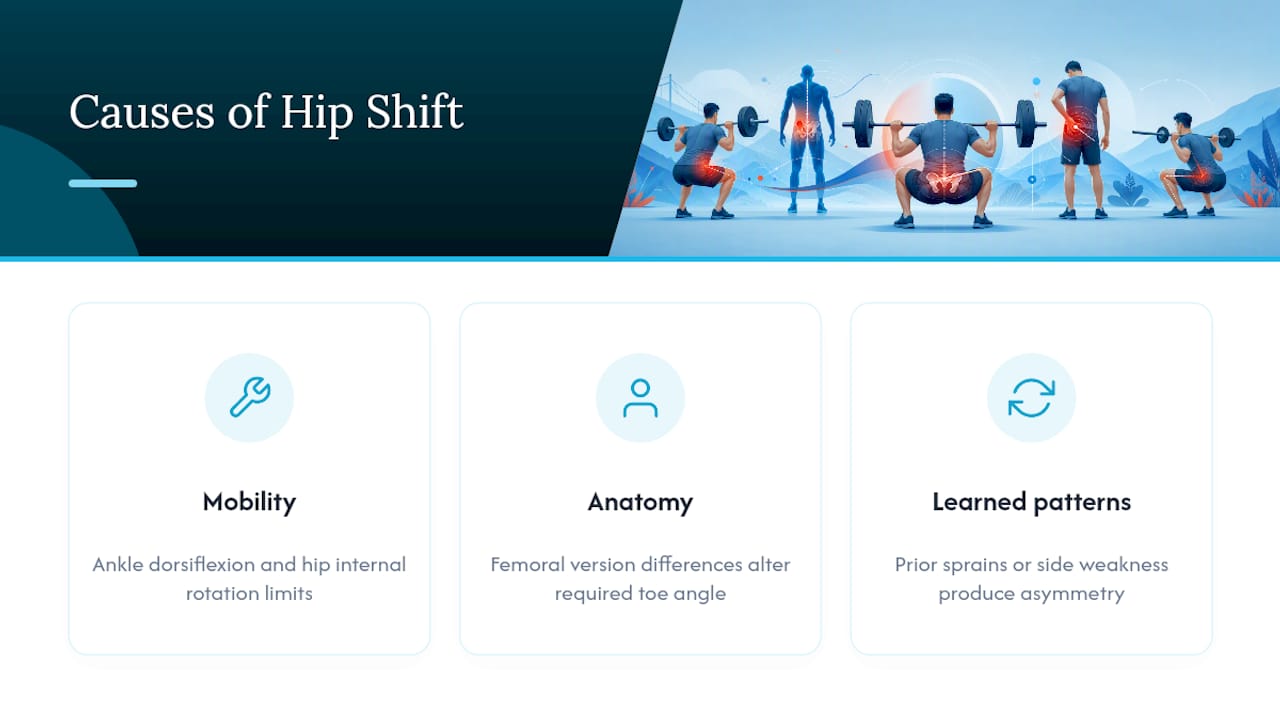
Most hip shifts trace back to one of four categories: mobility restriction, anatomical variation, learned compensation, or stance mismatch. Rarely is it just one of these in isolation.
Ankle dorsiflexion limitations are one of the most common and most overlooked drivers. If your ankle can’t bend forward enough to let the knee travel over the toes, your body finds another way down, often by shifting weight and rotating through the hip and foot instead. Tight gastrocnemius muscles frequently compound this, since a stiff calf restricts the same forward knee travel that dorsiflexion needs.
Restricted hip internal rotation plays a similar role from higher up the chain. Squatting to depth requires the femur to rotate slightly within the hip socket. If that rotation is blocked, the pelvis often tips posteriorly instead of tilting forward, and the body compensates by shifting laterally to keep descending.
Anatomical differences matter more than most lifters realize. Femoral version, meaning the natural twist of the thigh bone within the hip socket, varies from person to person and even side to side in the same body. A lifter with more retroversion on one side may need a different toe angle on that foot just to access the same depth without compensating.
Learned compensation and asymmetry round out the list. A prior ankle sprain, an old hip strain, or months of favoring one leg after any minor injury can leave neuromuscular patterns that outlast the original issue. Relative strength differences between the hips, glutes, and adductors on each side often show up here too, sometimes as the result of the injury, sometimes as the cause of the original compensation.
How Do You Assess a Hip Shift Yourself?
Before assuming you know the cause, run through a short screening sequence. This is the same logic clinicians use to isolate what’s driving a compensation before prescribing a fix.
- Film the squat from two angles. Set a phone up directly in front of you and directly to the side, then record a working set, not just a warm-up rep. The shift often only appears once fatigue or load increases.
- Run the heel-lift test. Place a 2 inch heel wedge or plates under your heels and squat again. If the shift disappears or noticeably improves, ankle dorsiflexion is likely a primary driver, according to research on muscle activation and heel-lift effects on medial knee displacement.
- Try a single-leg squat or step-down on each side. Watch whether the knee caves and the hip drops on one side more than the other. A clear side-to-side difference points toward asymmetry rather than a bilateral mobility limit.
- Check hip internal and external rotation while lying on your stomach with your knee bent to 90 degrees, letting your shin fall in and out. Compare both sides for range and any pinching.
- Test ankle dorsiflexion with a simple wall test: kneel with your toes a few inches from a wall and try to touch your knee to the wall without the heel lifting. Less than about four inches of clearance suggests a real restriction.
Each result should point you toward a specific driver rather than a generic fix.
The Mobility Side: Hips, Ankles, and Pelvic Position
Three mobility factors show up again and again in lifters with a hip shift, and they interact more than people expect.
Anterior pelvic tilt access matters because a proper squat setup relies on the ability to tilt the pelvis forward slightly at the top and then control that position through the descent. Lifters who can’t access this tilt often default to an adduction-driven strategy instead, pulling one leg inward to create artificial stability. That single compensation is frequently the actual source of what looks like a hip-driven shift.
Hip rotation range determines whether you can reach full depth without needing to twist or shift to “find” more room. Limited internal rotation on one side in particular tends to produce a shift toward the tighter hip, since the body routes around the restriction rather than through it.
Ankle dorsiflexion rounds out the picture. When the ankle can’t bend enough, the foot often pronates and the tibia rotates internally to compensate, which then drags the knee and hip out of alignment above it. This is a mechanical chain reaction rather than three separate problems:
- Limited ankle dorsiflexion forces compensatory foot pronation.
- Pronation drives internal tibial rotation.
- That rotation pulls the knee medially and destabilizes hip position above it.
Addressing all three areas together tends to outperform fixing any single one in isolation, which is part of why a corrective program that combined hip and ankle mobility work reduced both medial knee displacement and 3D knee valgus in a controlled intervention study.
Does Glute Strength Actually Fix a Hip Shift?
Not by itself, and the muscle-activation research explains why. Studies comparing lifters with and without medial knee displacement found that those who displaced showed measurably greater activation in the hip adductors, gastrocnemius, and tibialis anterior during the squat, not weaker glutes overall.
That’s a meaningfully different problem than the one most training programs assume. Adding banded lateral walks or clamshells targets glute activation, but if the real issue is an overactive calf and adductor complex compensating for restricted ankle range, more glute work won’t change the movement pattern. In the same research, applying a 2 inch heel lift dropped tibialis anterior activation by roughly 55% in the group showing medial knee displacement and eliminated the medially directed knee motion entirely, according to the study on muscle activation and heel-lift effects. That’s not a training effect. It’s an immediate mechanical change from removing the ankle-range demand.
The practical takeaway is that motor control and coactivation patterns matter as much as raw strength. Two lifters can have identical glute strength on a dynamometer and still produce very different squat patterns, because one has learned to stabilize through the adductors and calves while the other uses the hip properly. A broader review of modifiable factors in dynamic knee valgus backs this up, recommending glute activation work alongside trunk lateral strength and ankle range rather than glute work alone, according to a systematic review of knee valgus risk factors.
A Stepwise Program to Correct a Persistent Hip Shift
Work through this in order. Skipping ahead to strength work before ruling out mobility restrictions is the most common reason glute-focused programs fail to change anything.
- Run diagnostic trials first. Add a 2 inch heel lift and squat. Then try a wider stance with more toe-out. Then try a narrower stance with less toe-out. Note which change, if any, immediately reduces or eliminates the shift on video.
- Address the mobility limitation the trial points to. If the heel lift helped, prioritize calf release work and slant-board ankle stretches for two to three weeks. If hip rotation felt limited on the internal or external rotation test, add targeted hip mobility drills before loaded squatting.
- Retrain motor control once mobility improves. Reverse lunge or rear-foot elevated split squats (RFESS) done with a controlled three-second lowering phase build single-leg stability without the bilateral compensation habit. Reactive neuromuscular training (RNT), using light band tension pulling the knee into the faulty position to cue against it, teaches the nervous system a new default.
- Reintegrate the pattern into the full squat. Box squats and pause squats at the bottom position force you to actively hold correct alignment rather than bouncing through the compromised range. Single-leg RDLs continue building the unilateral hip stability that supports the change under load.
- Reload and re-test. Add weight back gradually over two to three weeks, filming periodically to confirm the shift stays reduced as load increases rather than creeping back in.
Pro Tip: Test one variable at a time during your diagnostic trials. Changing stance width and toe-out simultaneously might fix the shift, but you won’t know which change actually mattered, and you’ll waste weeks training the wrong correction.
On programming, two to three sessions per week focused on the mobility and motor-control work is typically enough to see change. One study using a comparable structure, ten sessions over three weeks of combined hip and ankle work, produced measurable reductions in medial knee displacement and improved ankle dorsiflexion range, according to the same corrective exercise intervention. Re-test with the same video and heel-lift protocol at the three-week mark rather than guessing whether it’s working.
For deeper hip mobility work between sessions, drills like 90/90 transitions and hip CARs pair well with the RFESS and RNT progressions above.
Should You Change Your Stance or Foot Angle?
Sometimes the fastest fix isn’t a mobility drill at all. It’s simply finding the stance your hip anatomy actually supports. Femoral version, the natural twist of your thigh bone, varies enough between individuals that a universal “toes at 15 degrees” cue is bad advice for a meaningful share of lifters.
Trial this systematically rather than randomly:
- Start at your current stance and toe angle, and film a working set for baseline comparison.
- Widen your stance by roughly one shoe length and add five to ten degrees more toe-out, then squat and film again.
- Narrow your stance from baseline with less toe-out, and repeat.
- Compare all three on video: which one lets you reach full depth with the least visible pelvic shift and the most comfortable bottom position?
Cueing here matters more than people think. Generic instructions like “push your knees out” often make things worse if they push a lifter’s knee past their natural thigh-foot alignment, according to a coaching breakdown on knee valgus cueing. The goal is alignment specific to your joints, not a forced position that looks correct on someone else. If a stance change reduces the shift, improves depth, and doesn’t create new discomfort anywhere, it’s reasonable to adopt permanently. If it only shifts the compensation somewhere else, keep testing.
When Should You Leave a Hip Shift Alone?
Not every hip shift needs correcting, and treating a stable, harmless pattern like a problem can actually hurt performance. If the shift is small, shows up consistently regardless of load or fatigue, comes without pain, and isn’t limiting your strength progress, it’s likely just your movement signature. Forcing a “textbook” symmetrical squat onto that pattern sometimes reduces output for no real benefit, according to practical guidance on when not to force correction.
Get it evaluated by a professional when any of these show up:
- The shift gets noticeably worse as weight or fatigue increases, rather than staying stable.
- You have pain in the hip, knee, ankle, or low back during or after squatting.
- You’re working around a prior surgery or significant injury on one side.
- Home corrective work over three to four weeks hasn’t changed the pattern at all.
A clinician assessment adds diagnostic clarity that video alone can’t. Manual therapy can address soft-tissue restrictions that resist stretching, and a professional can build a progression specific to a persistent hip issue rather than a generic template.
A 4 to 6 Week Sample Progression Grounded in Clinical Assessment
This scaffold reflects the assessment-first sequence outlined above, compressed into a realistic timeline. Adjust pacing based on your re-test results, not the calendar.
- Weeks 1 to 2, assessment and mobility. Confirm your driver using the heel-lift and rotation tests. Address the specific restriction found: calf and ankle work if dorsiflexion was limited, or hip capsule and rotation drills if that tested tight. Three sessions weekly, 10 to 15 minutes of targeted mobility per session.
- Weeks 2 to 4, motor control. Layer in RFESS and RNT squats two to three times weekly, three sets of six to eight reps per side, focusing on controlled tempo over load.
- Weeks 4 to 6, integration. Reintroduce box or pause squats at moderate load, three sets of five, adding weight only when the pattern holds clean on video.
Session structure at each stage stays similar:
- Five to ten minutes targeted mobility work specific to your assessed restriction.
- Three sets of unilateral or motor-control work (RFESS, RNT, single-leg RDL).
- Two to three sets of the integrated squat variation at that week’s prescribed load.
For soft-tissue restrictions that don’t respond to stretching alone, hands-on approaches like the Fascial Distortion Model or dry needling can address restrictions that home mobility work misses, particularly around chronic calf tightness or old scar tissue from a prior injury.
What Coaches Get Wrong About “Fixing” Asymmetry
Perfect symmetry isn’t a realistic or even useful goal. Every lifter has some anatomical asymmetry, and training that ignores it in favor of a textbook standard often creates more compensation than it resolves.
The better approach is assessment first: find the actual driver, set a measurable target like depth or bar speed rather than a purely visual one, and involve the lifter in deciding whether a change is worth making. A hip shift that doesn’t limit function or cause pain isn’t a flaw to eliminate. It’s information about how that particular body moves.
— Chris
How The Tx Room Supports a Persistent Hip Shift
Thetxroom gives you what a YouTube corrective routine can’t: a hands-on assessment that identifies your specific driver instead of guessing from a phone video. Try the diagnostic trials and mobility work above for two to three weeks first. If the shift keeps worsening, pain shows up, or you’re working around a prior injury, that’s the signal to bring in a professional set of hands.

The clinic’s Chiropractic Care addresses joint mechanics and alignment issues that home mobility work can’t reach on its own, while Dry Needling and the Fascial Distortion Model target the soft-tissue restrictions in the calf, hip, and adductor complex that often drive the compensation in the first place. For deeper, stubborn tissue restrictions, MyACT focused shockwave therapy can speed recovery where stretching alone has stalled. If home correction hasn’t moved the needle after a few weeks, book an assessment at The Tx Room in Plano to get a clear answer on what’s actually driving your pattern.
Sources
The clinical claims in this guide draw on peer-reviewed research into ankle dorsiflexion and medial knee displacement, along with clinician-written rehabilitation guides on hip-shift correction:
- Muscle activation differences and heel-lift effect on MKD (PMC3465033)
- Hip shift in a squat — biomechanical explanation and rehab progressions (Chaplin Performance)
- Hip shift during squats — causes, when to fix, and corrective progressions (Barbell Rehab)
FAQ
What causes a hip shift when squatting?
Most hip shifts come from ankle dorsiflexion restriction, limited hip internal rotation, learned compensation after an injury, or a stance and toe angle that doesn’t match your femoral anatomy. Often it’s a combination of two or three of these rather than a single cause.
What are the worst exercises for my hips if I have a shift?
There’s no universal “worst exercise” list, but forcing heavy, deep squats with a stance and toe angle that doesn’t match your anatomy while ignoring pain is the most common way lifters make a hip shift worse. Isolated glute-only accessory work, done without addressing an underlying ankle or hip mobility restriction, also tends to produce little change.
What is a Slavic squat position?
The term generally refers to a deep, relaxed resting squat with heels flat and a wide, comfortable stance, common as a resting posture in parts of Eastern Europe. It’s unrelated to barbell squat technique and isn’t a corrective exercise for hip shift.
What causes lateral hip shift specifically?
A lateral hip shift is most often driven by asymmetrical mobility restriction, such as tighter hip internal rotation or a stiffer ankle on one side, or by learned compensation from a past injury on that side. The heel-lift test and single-leg squat comparison are the fastest ways to isolate which side and which structure is driving it.