

Shoulder Blade Pain Relief: Exercises and Home Remedies
The fastest safe path to shoulder blade pain relief is a short rest from whatever triggered it, ice for the first 48 hours, and one or two gentle scapular squeezes to keep the area from locking up. Find a clinic that offers myofascial release treatments that will help work out the fascial adhesions that are most likely there. Most cases of pain between the shoulder blades trace back to rhomboid strain, thoracic joint stiffness, or postural overload — all of which respond well to the steps below.
Quick-action checklist:
-
Ice now (acute strain): Apply a cloth-wrapped ice pack for short periods during the first day or two after injury.
-
Short rest: Avoid the movement that caused the pain, but don’t stay completely still — total immobility slows recovery.
-
OTC medication: Over-the-counter pain relievers such as ibuprofen, naproxen, or acetaminophen may help reduce pain and inflammation.
-
Gentle scapular squeeze: Sit tall, pull your shoulder blades together and down, hold 5 seconds, release. Repeat 5 times.
-
Modify, don’t stop: Keep walking and doing light daily tasks. Movement keeps blood flowing to the injured tissue.
-
Topical option: A menthol or diclofenac gel applied to the sore area can take the edge off without systemic side effects.
Stop self-care and seek emergency care immediately if you feel chest pressure, shortness of breath, pain radiating to your jaw or neck, sudden arm weakness or numbness, or unexplained dizziness. These symptoms can signal cardiac, pulmonary, or other internal causes that require urgent evaluation, not a heating pad. Cleveland Clinic’s guidance on upper back pain lists these as red flags requiring immediate attention.
For readers in Plano, TX who want hands-on evaluation rather than guesswork, Thetxroom offers FDM-based chiropractic care specifically for musculoskeletal injuries like this.
Key Takeaways
Shoulder blade pain relief comes fastest when you combine immediate self-care (ice, rest, gentle movement) with progressive exercises that restore both thoracic mobility and scapular stability.
| Point | Details |
|---|---|
| Start with ice and rest | Apply ice for 15–20 minutes in the first 48 hours; avoid total immobility. |
| Progress through exercises | Begin with scapular squeezes and stretches, then add prone Y/T/I and band rows as pain allows. |
| Fix your workstation | Adjust monitor height, keyboard distance, and take a movement break every 20–30 minutes. |
| See a provider after 2–3 weeks | If pain doesn’t improve or worsens, book a clinical assessment — don’t wait months. |
| Thetxroom for hands-on care | Thetxroom in Plano, TX offers FDM-based chiropractic and individualized rehab for shoulder blade pain. |
Table of Contents
What home remedies actually work for shoulder blade pain?
The right home remedy depends on timing. Acute strain (happened in the last 48 hours) calls for cold. Chronic tightness or recurring stiffness calls for heat. Mixing them up is one of the most common mistakes people make.
Ice vs. heat — the practical rules:
-
Ice (first 0–48 hours): Reduces swelling and numbs sharp pain. Use 15–20 minutes on, at least 40 minutes off. Never apply directly to skin.
-
Heat (after 48 hours, or for chronic tightness): Loosens tight muscles and improves local circulation. A moist heat pack or warm shower works well for 15–20 minutes.
-
Alternating: Once the acute phase passes, alternating cold and heat can help stubborn muscle guarding — end with heat to leave the tissue relaxed.
OTC medications:
-
NSAIDs (ibuprofen, naproxen): Best when inflammation is driving the pain. Take with food; check with a clinician if you have kidney, GI, or cardiovascular concerns.
-
Acetaminophen: Effective for pain without anti-inflammatory action. Useful if NSAIDs are off the table, but watch total daily dose carefully.
-
Topical diclofenac gel (Voltaren): Delivers anti-inflammatory action locally with less systemic exposure — a solid choice for localized soreness.
-
Menthol creams (Biofreeze, Icy Hot): Provide temporary sensory relief through a cooling or warming effect. Not anti-inflammatory, but useful for managing day-to-day discomfort.
Common self-care steps work best in combination — rest alone rarely resolves the underlying tension.
Pro Tip: Always place a thin cloth between an ice pack or heat pack and your skin. Even 20 minutes of direct contact can cause a skin burn or frostbite, especially if you fall asleep with it in place.
Stretches and exercises that reduce shoulder blade pain
Clinical evidence supports combining thoracic mobility work with progressive scapular strengthening for better functional outcomes — not just one or the other. The exercises below are ordered from gentlest to most demanding. Start at the top and progress only when each step is pain-free.
Safety rule: Stop any exercise that produces sharp, shooting, or radiating pain. Dull muscular fatigue is normal; nerve-like symptoms are not. If you suspect a structural cause (disc, rib, or nerve), get a clinical assessment before loading the area.
1. Scapular squeezes
Purpose: Activates the rhomboids and mid-trapezius; the starting point for scapular stability.
Sit or stand tall. Pull both shoulder blades toward each other and slightly downward and hold briefly before releasing. Repeat several times throughout the day. Common mistake: shrugging the shoulders up instead of pulling them back and down.
2. Rhomboid stretch
Purpose: Releases the rhomboids and mid-back; addresses rhomboid strain treatment directly.
Sit in a chair. Extend both arms forward at shoulder height, clasp your hands, and round your upper back gently — let the shoulder blades separate. Hold gently for a short period and repeat a few times. Regression: do one arm at a time, reaching across the body.
3. Wall angels (wall slides)
Purpose: Trains scapular upward rotation and thoracic extension simultaneously.
Stand with your back against a wall with feet spaced comfortably apart. Press your lower back, upper back, and head into the wall. Raise your arms to a “goalpost” position (elbows at 90°). Slowly slide arms up toward overhead, keeping contact with the wall throughout. Return. Perform several repetitions and sets as tolerated. If your arms lose wall contact, reduce the range.
4. Prone Y/T/I raises
Purpose: Strengthens the lower trapezius and serratus anterior — the muscles most responsible for scapular control.
Lie face-down on a mat or a firm surface, arms at your sides. For the Y: raise both arms diagonally at roughly 45° from your body (thumbs up), hold 2 seconds, lower. For the T: arms straight out to the sides. For the I: arms straight overhead. Do a moderate number of repetitions per position, with a couple of sets, focusing on form. These are harder than they look — use no weight until the form is solid. Prone Y/T/I exercises are among the most commonly recommended for restoring scapular control.
5. Doorway chest stretch
Purpose: Opens the pectorals and anterior shoulder, which pull the scapula forward when tight.
Stand in a doorway. Place forearms on the door frame at 90°. Step one foot forward and lean gently through the opening until you feel a stretch across the chest and front of the shoulders. Hold the stretch gently and repeat a few times. Do not force the stretch if you feel pinching in the front of the shoulder.
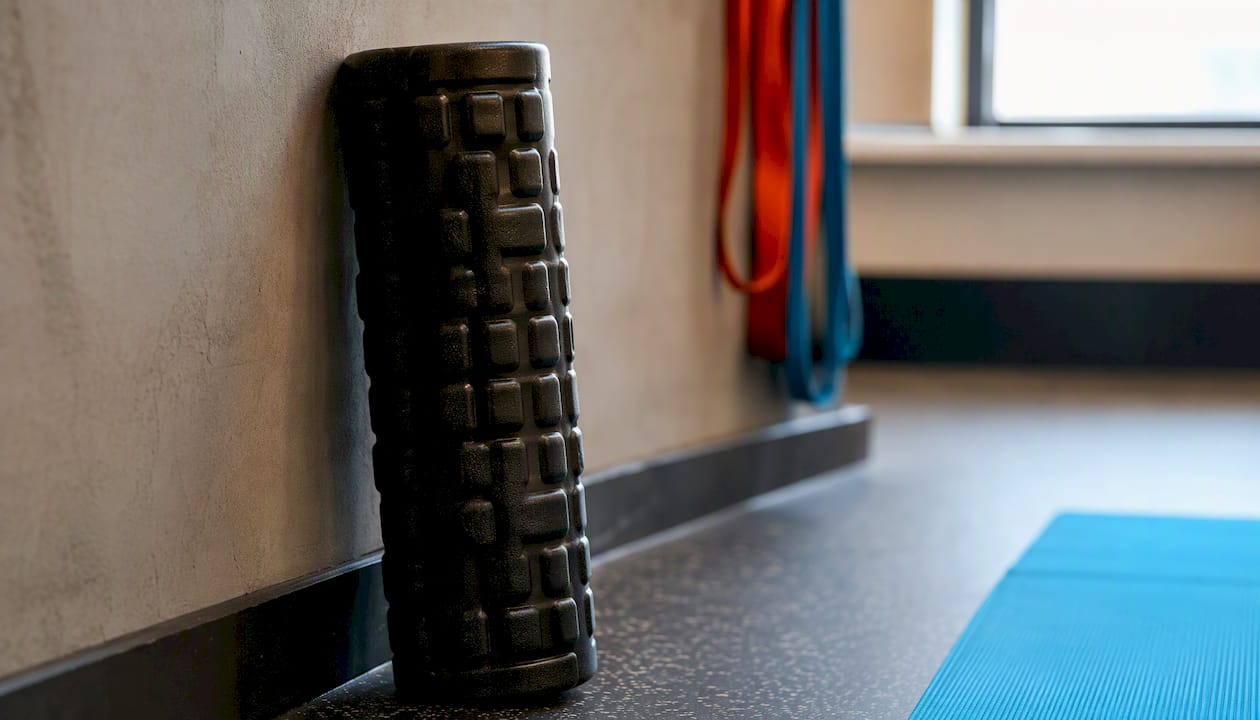
6. Thoracic extension over a foam roll
Purpose: Restores thoracic extension mobility — the single most common mechanical deficit in people with chronic interscapular pain.
Place a foam roller horizontally on the floor. Sit in front of it, then lean back so the roller sits at mid-back (not the lower back or neck). Support your head with your hands. Gently extend over the roller, breathing out as you go. Hold the thoracic extension position briefly, then shift the roller to different positions along the upper back and repeat.
7. Band rows
Purpose: Builds rhomboid and mid-trap endurance under load — the final step before returning to sport or heavy work.
Anchor a resistance band at chest height. Hold one end in each hand, step back to create tension. Pull both hands toward your lower ribs, squeezing the shoulder blades together at the end. Return slowly. Perform multiple repetitions and sets several times per week, increasing resistance gradually as comfort allows. Progression: increase band resistance when 15 reps feel easy. Regression: reduce range of motion or use a lighter band.

How to self-massage the shoulder blade safely
Self-massage tools work best when you match the tool to the problem. A foam roller is ideal for thoracic mobility and broad muscle tension. A tennis or lacrosse ball targets focal trigger points in the rhomboids or subscapularis. A percussion device (like a Theragun or Hypervolt) addresses superficial muscle tension quickly but needs careful settings.
Tool-by-tool technique:
-
Wall ball (tennis or lacrosse ball): Stand with your back against a wall. Place the ball between the wall and the area just medial to your shoulder blade (not on the spine). Lean into it gently and hold on tender spots for 20–30 seconds. Shift position slightly and repeat. Keep pressure moderate — you should feel relief, not sharp pain.
-
Seated ball against a chair: Sit in a firm chair. Place the ball between your mid-back and the chair back. Lean back and let your body weight apply gentle pressure. Useful if standing against a wall is uncomfortable.
-
Foam roll thoracic extension: As described in the exercises section above — this doubles as both a mobility drill and a self-massage technique for the thoracic erectors.
-
Percussion device: Keep the speed setting low and limit each area to 30–60 seconds. Use the round attachment, not a pointed one, over the muscle belly. Never run it directly over the spine or rib joints.
Self-massage tools can ease trigger points, but aggressive pressure on the spine or rib joints can worsen pain or irritate nerves. Stop immediately if you feel numbness, tingling, or pain that radiates down the arm or around the rib cage. Rib pain after lifting or a sensation that a rib is “out of place” (sometimes called rib subluxation or rib dysfunction) warrants a clinical assessment before aggressive self-treatment.
Posture fixes and workstation habits that stop recurrence
Poor posture doesn’t cause shoulder blade pain on its own, but it loads the rhomboids and thoracic joints unevenly for hours at a time. That cumulative strain is what tips a mildly irritated muscle into a full flare. The fixes below are simple and take under five minutes to implement.
Workstation ergonomics checklist:
-
Monitor top at or just below eye level — looking down all day compresses the cervical spine and loads the upper traps.
-
Keyboard close enough that your elbows stay near 90° and your shoulders don’t creep forward.
-
Chair back supporting the lumbar curve so the thoracic spine doesn’t collapse into flexion.
-
Feet flat on the floor or on a footrest — hip angle at roughly 90°.
-
Screen distance: roughly arm’s length (18–24 inches) to reduce forward head posture.
Posture cues to practice hourly:
Chin tuck (gently pull the chin straight back, not down), shoulders down and back, and a soft chest lift. These three cues together reset the thoracic spine toward neutral. Set a phone reminder every 60 minutes if you work at a desk.
Break schedule: Stand and move for at least 2 minutes every 20–30 minutes. During that break, do 5 scapular squeezes and 5 thoracic rotations (seated, arms crossed, rotate left and right). That’s enough to interrupt the postural loading cycle. Typing-related shoulder tightening builds faster than most people realize — the break schedule is not optional if you sit for long stretches.
Sleep position: Side-sleeping with a pillow thick enough to keep your head neutral (not tilted toward the mattress) reduces overnight strain on the cervical-thoracic junction. A small pillow between the knees also reduces thoracic rotation during sleep. Stomach sleeping tends to worsen upper-back and neck pain and is worth avoiding during a flare.
When should you see a provider about shoulder blade pain?
Most mechanical shoulder blade pain improves within 2–3 weeks of consistent self-care. When it doesn’t, or when specific symptoms appear, a clinical assessment changes the outcome.
Seek emergency care immediately for:
-
Chest pressure or tightness
-
Shortness of breath at rest
-
Pain radiating to the jaw, neck, or left arm
-
Sudden arm weakness or numbness
-
Unexplained dizziness or nausea
These are not musculoskeletal symptoms. Cleveland Clinic identifies these as red flags that require emergency evaluation, not home care.
Recovery timeline and booking thresholds:
| Presentation | Typical timeline | When to book a provider |
|---|---|---|
| Acute rhomboid strain (mild) | Days to 2–3 weeks | If no improvement after 2–3 weeks |
| Persistent mechanical interscapular pain | 4–8 weeks with care | After 2–3 weeks of failed self-care |
| Thoracic joint stiffness | Weeks to months | Early — responds faster with manual therapy |
| Suspected nerve or rib involvement | Variable | Promptly — self-care alone is insufficient |
What a clinician evaluates:
A thorough assessment covers posture, thoracic mobility, scapular control, and a neurological screen (reflexes, sensation, strength). Imaging (X-ray, MRI) is typically reserved for cases with red flags, trauma history, or no response to 4–6 weeks of conservative care. Most mechanical shoulder blade pain does not need imaging to begin treatment.
Common causes and how they change treatment:
-
Rhomboid or mid-trap strain: Rest, progressive loading, posture correction.
-
Thoracic joint stiffness: Manual mobilization plus mobility exercises.
-
Cervical referral: Neck pain treatment targeting the cervical spine, not just the shoulder blade.
-
Rib irritation or rib dysfunction: Gentle mobilization; avoid aggressive stretching until assessed.
-
Slipping rib syndrome: Requires clinical diagnosis; self-care is supportive only.
A simple 4-week plan to prevent shoulder blade pain from coming back
This plan follows the standard clinical progression: control pain first, restore mobility second, build strength third, then integrate it into real-life movement. Don’t skip ahead.
Week-by-week program:
-
Week 1 — Pain control and gentle mobility: Ice or heat as needed. Scapular squeezes (2 sets × 10, twice daily). Rhomboid stretch (3 × 30 seconds, twice daily). Thoracic extension over a foam roll (5 positions, once daily). Posture breaks every 30 minutes.
-
Week 2 — Mobility focus: Add wall angels (2 sets × 10, once daily). Add doorway chest stretch (3 × 30 seconds). Continue scapular squeezes. Reduce ice/heat to as needed only.
-
Week 3 — Strength introduction: Add prone Y/T/I (2 sets × 8 each, 3 days per week). Add band rows with light resistance (3 sets × 12, 3 days per week). Continue all mobility work.
-
Week 4 — Functional integration: Increase band row resistance when 15 reps feel easy. Add a second set of prone Y/T/I. Begin returning to sport or lifting with attention to scapular control. Maintain posture habits and daily mobility work.
Progression rules:
-
Add resistance or range only when the current level is pain-free for two consecutive sessions.
-
If pain increases after adding load, drop back one step and hold for another week.
-
If you experience radiating pain, numbness, or tingling at any point, stop and seek a clinical assessment.
When to refer out:
-
Pain persists beyond 4 weeks despite consistent effort.
-
Recurring flare-ups every few weeks despite completing the program.
-
Any neurological signs (weakness, numbness, tingling) at any stage.
-
Suspected rib subluxation, rib dysfunction, or slipping rib syndrome — these need hands-on evaluation, not more home exercise.
Exercise therapy can be as effective as injection or surgery for certain shoulder conditions, but that outcome depends on doing the right exercises consistently — not just occasionally.
When does hands-on care speed up recovery?
Home exercise handles a lot. But three situations consistently respond faster to hands-on care than to self-directed stretching alone: thoracic joint stiffness that won’t budge, persistent rhomboid trigger points that keep returning, and movement faults (like scapular winging or poor upward rotation) that the person can’t self-correct.
At Thetxroom in Plano, TX, the primary hands-on approach is the Fascial Distortion Model (FDM). FDM is a manual therapy framework in which the clinician identifies specific fascial distortions — essentially, areas where the connective tissue has lost its normal architecture — and applies targeted manual techniques to restore it. The assessment is movement-based: the clinician watches how you move, where you guard, and how you describe the pain (the way patients gesture toward their pain is actually diagnostic in FDM).
A typical session at Thetxroom involves a movement screen, hands-on FDM work targeting the identified distortions, and a short set of corrective exercises to reinforce the change. Sessions are focused and relatively brief compared to a traditional chiropractic visit.
For mechanical interscapular pain, thoracic joint stiffness often produces measurable improvement within 3–6 sessions when manual therapy is paired with a consistent home exercise program. Hands-on care alone, without the home component, tends to produce shorter-lasting results.
Thetxroom also offers myofascial acoustic compression therapy for persistent soft-tissue tension, and individualized rehab plans that bridge the gap between acute care and return to full activity. The clinic treats athletes and non-athletes, and the approach adapts to the individual’s activity level and goals.
Why mobility and stability both matter for lasting relief
Most people who come in with chronic shoulder blade pain have been stretching for weeks. They’ve watched videos, done the rhomboid stretch, maybe even bought a foam roller. And they feel better for an hour, then the pain comes back. The reason is almost always the same: they restored some mobility but never built the stability to hold it.
The thoracic spine needs to move freely, but the scapula needs to be controlled by muscles strong enough to keep it in position during daily tasks. When the mid-trapezius and serratus anterior are weak, the rhomboids overwork to compensate, and they stay chronically irritated no matter how often you stretch them. Stretching a muscle that’s overworking because its synergists are weak is like loosening a rope that’s only tight because the other ropes are slack.
The clinical trajectory I see most often: someone does home care for 2–3 weeks, gets partial relief, then plateaus. That plateau is the signal to add progressive loading (the prone Y/T/I and band rows in the plan above) and, if the thoracic joints are stiff, to get a session or two of manual mobilization to unlock the range that the exercises then reinforce. The sequence matters. Trying to strengthen before restoring mobility just loads a restricted pattern harder.
Thetxroom offers hands-on shoulder blade care in Plano, TX
Shoulder blade pain that hasn’t responded to two or three weeks of home care usually has a mechanical component that self-treatment can’t fully address — a stiff thoracic joint, a persistent fascial distortion, or a movement fault that needs eyes on it. That’s exactly what Thetxroom is built for.

At Thetxroom in Plano, TX, the first visit includes a movement-based assessment to identify what’s actually driving the pain — not just where it hurts. From there, the clinician applies FDM manual techniques and myotherapy targeted to the specific tissue involved, then builds an individualized rehab plan you can continue at home. The goal is measurable improvement fast, not an open-ended treatment schedule.
Thetxroom treats both athletes and non-athletes, and the approach scales to your activity level. If you’re ready to stop guessing and get a clear answer on what’s causing your shoulder blade pain, book a visit for range of motion care or call the Plano clinic directly to schedule your first appointment.
Sources
-
Upper Back Pain | Symptoms and When to Seek Care — Cleveland Clinic
-
PMC article: evidence supporting combined mobility and strengthening approaches
-
Rhomboid Muscle Pain: Causes, Symptoms, Prevention, Treatment — WebMD
-
Shoulder Blade Pain: Causes, Relief, and Red Flags — Better Health PT
This article is general information, not a substitute for advice from a qualified doctor. Consult a qualified healthcare professional about your own circumstances before acting on anything here.